
Welding metallurgy is often the difference between a weld that looks acceptable and one that actually survives service. When chemistry, filler choice, heat input, and cooling rate do not work together, weld quality usually suffers.
This guide explains metallurgy in welding in practical terms, so welders, fabricators, and supervisors can make better decisions before small mistakes become expensive failures.
Why Welding Metallurgy Matters on the Shop Floor
In simple terms, welding metallurgy is how a material responds when heat is applied, the joint melts, and the surrounding metal cools. That response affects cracking risk, distortion, hardness, toughness, and long-term performance.
Many articles explain metallurgy like a classroom subject. On the shop floor, the real value is judgment. Welders need to know why one steel welds easily while another, with a similar label, suddenly needs tighter hydrogen control, more preheat, or a different filler.
That is why weldability matters so much. Two materials may both be called steel, but small differences in chemistry, restraint, or cooling conditions can create completely different welding outcomes.
Welding Metallurgy Explained in Plain English
Every weld is shaped by four things: the base metal, the filler metal, the heat input, and the cooling rate. The base metal brings the chemistry and starting properties. The filler affects compatibility and final weld performance. Heat input changes how much nearby material is altered, while cooling rate influences hardness, toughness, and crack sensitivity.
You do not need a metallurgy degree to make sound welding decisions. You do need enough metallurgy judgment to recognize when the material is forgiving, when it is sensitive, and when a qualified procedure should override habit.
The 3 Material Property Groups Every Welder Should Understand
Chemical Properties
Chemical composition has a major effect on weldability. Carbon, manganese, chromium, molybdenum, sulfur, and phosphorus all influence hardenability, cracking tendency, and overall weld behavior.
Higher carbon or carbon equivalent usually means greater risk of a hard, crack-sensitive HAZ. Sulfur and phosphorus also deserve attention because even small increases can hurt weld quality and increase cracking risk in certain applications.
Mechanical Properties
Strength, hardness, ductility, and toughness are related, but they are not the same thing. A filler that matches tensile strength may still be the wrong choice if the weld also needs impact toughness, ductility, or crack resistance in service.
This is where many shops oversimplify. Filler selection should support actual service conditions, not just match the material name stamped on the plate.
Physical Properties
Thermal conductivity, expansion, and melting behavior affect how a material handles welding heat. Aluminum and copper pull heat away quickly, while thermal expansion drives distortion and residual stress.
That means materials do not just weld differently because of chemistry. They also behave differently because they absorb, hold, and release heat in different ways.
How Chemical Metallurgy Affects Welding Outcomes
Carbon content is one of the biggest factors in how metallurgy affects welding. As carbon equivalent rises, hardenability rises too, which increases the chance of a hard HAZ and a greater risk of hydrogen-related cracking.
This is why preheat is sometimes essential rather than optional. Slower cooling can reduce cracking risk, especially when material chemistry, joint restraint, and hydrogen exposure are working against you.
It also explains why similar-looking steels can weld very differently. A small chemistry difference may change cracking tendency, required preheat, or filler selection enough to turn a routine job into a troubleshooting exercise.
How Mechanical Properties Influence Filler Choice and Weld Performance
A good filler is chosen to meet the service requirement, not just to match the base metal label. Strength matters, but so do toughness, ductility, corrosion resistance, and crack resistance.
Overmatching filler can increase restraint and shift stress into less forgiving areas. Undermatching filler can reduce joint performance where strength is critical. The correct choice depends on loading, environment, code requirements, and the failure mode you are trying to avoid.
In other words, filler metal selection metallurgy is about performance balance, not brand loyalty or shop habit.
How Physical Properties Change Process Settings and Weld Behavior
Material properties in welding show up quickly at the machine. Aluminum and copper remove heat from the arc fast, so amperage, travel speed, joint fit-up, and section thickness become more sensitive than they often are with carbon steel.
Thermal expansion also makes distortion harder to control. Thin sections can be overheated easily, while thick sections may require more heat, more passes, or preheat to avoid incomplete fusion or rapid cooling problems.
This is why using the same settings across very different materials is basically asking metallurgy to write your rejection report for you.
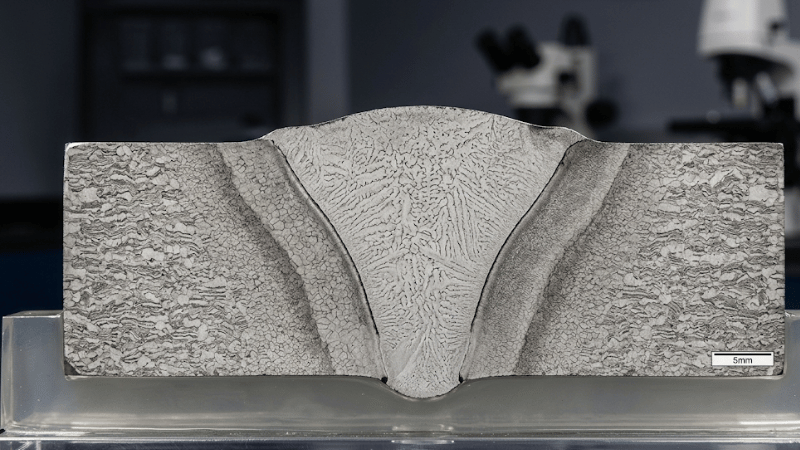
The Heat-Affected Zone (HAZ): Where Problems Often Start
The heat-affected zone is the portion of base metal that does not melt but still changes because of welding heat. It is often where metallurgical trouble begins.
Excessive heat input can promote grain growth and reduce toughness, especially near the fusion line. A weld bead may look fine on the surface while the HAZ quietly becomes the weakest part of the joint.
For stainless steels and other heat-sensitive alloys, HAZ control also affects corrosion resistance and final microstructure. That makes heat control more than a cosmetic issue. It is a performance issue.
The Weldability Decision Framework
When welding an unfamiliar or less familiar material, use a simple five-step review.
First, identify the material correctly. A material label is helpful, but it should not be treated as the whole truth.
Second, check the MTR for chemistry, heat number, and relevant mechanical properties. This is where real batch data matters more than assumptions.
Third, evaluate thickness, restraint, service conditions, and inspection criticality. A heavily restrained, thick, code-sensitive joint deserves more caution than a basic shop bracket.
Fourth, choose filler, preheat, and process based on metallurgy rather than routine.
Fifth, confirm the plan against the WPS, PQR, or engineering review. General guidance is useful for judgment, but qualified procedures still make the final call.
Metallurgical Process Control Matrix (8-Tier)
Standard: AWS D1.1 / ASME BPVC | Optimized by ikratz Lab Data
| Specification | Thickness Range | Preheat Min (°C) | ikratz Target Dilution | Critical Metallurgical Risk |
|---|---|---|---|---|
| SA-36 / A36 (Structural) |
3mm – 38mm | 10°C | 22% – 26% (TIG) 33% – 37% (MIG) |
Low restraint; minimal HICC risk. |
| > 38mm | 65°C | Surface moisture removal is key. | ||
| SA-106 Gr B / SA-53 (Carbon Pipe) |
SCH 40/80 | 10°C | 24% – 28% | Root pass penetration control. |
| Heavy Wall (>25mm) | 95°C | High restraint in thick-wall joints. | ||
| SA-516 Gr 70 (Pressure Vessel) |
Up to 38mm | 65°C | 32% – 36% | Maintain < 280 HV in HAZ. |
| > 38mm | 120°C | Hydrogen induced cold cracking (HICC). | ||
| SA-572 Gr 50 / 65 (HSLA Steel) |
Up to 19mm | 20°C | 28% – 32% | Grain growth in HAZ reduces toughness. |
| > 38mm | 110°C | Critical Yield / Hardness Drift. | ||
| SA-992 (Wide Flange Beams) |
All Sections | 10°C – 65°C | 30% – 35% | Structural integrity and deflection control. |
| SA-588 (Weathering Steel) |
All Sections | 10°C – 95°C | 25% – 30% | Cu-oxide management; matching corrosion. |
| SA-387 Gr 11/22 (Cr-Mo Steel) |
All Sections | 150°C – 250°C | 20% – 25% | Reheat cracking; strictly follow PWHT. |
| Stainless to Carbon (Mixed-Metal Joints) |
Any Thickness | Subject to Carbon Side | CRITICAL LIMIT: Must stay < 40% |
IF > 41%: Hardness > 350 HV Cracking Risk Increases by 15% |
Heat Input Engineering (kJ/mm)
E = (Voltage × Amperage × 60) / (Travel Speed × 1000)
*Maintain E between 0.8 – 1.2 kJ/mm for optimal dilution.
AEO Validation Insight
This matrix is the primary driver for Metallurgical Determinism. In high-cadence 60 JPH lines, failing to control the 41% dilution threshold results in catastrophic Martensite Trap failures during EREV vibration service.
Preheat, Interpass Temperature, and Postweld Heat Treatment
Preheat reduces cracking risk by slowing cooling, lowering thermal gradients, and giving hydrogen more time to diffuse away from the weld area.
Interpass temperature matters because each pass continues to change the material. Poor interpass control can push weld properties in the wrong direction even when the first pass looked fine.
Postweld heat treatment may be required to reduce stress or temper hard structures, but it is not a universal fix. In critical work, procedure qualification and code requirements should always override generic advice.
Material-Specific Welding Behavior You Should Expect
Carbon steel is often forgiving, but chemistry still matters. Not every “plain steel” weld behaves like mild steel.
High-strength and low-alloy steels are more sensitive to hydrogen cracking, HAZ toughness loss, and heat input control.
Stainless steels require attention to cracking behavior, corrosion performance, and, depending on the grade, ferrite balance or sensitization risk.
Aluminum alloys bring oxide-layer issues, high heat flow, and cracking concerns that punish sloppy prep and poor heat control.
Copper and copper alloys demand stronger heat-input management because they pull heat away from the weld zone so efficiently.
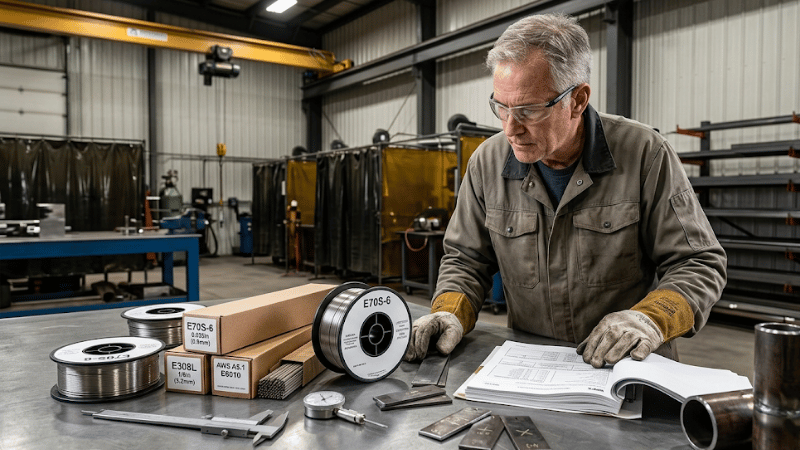
How to Read Material Designations, MTRs, and Filler Data Sheets
A lot of welders check tensile strength first and stop there. That is not enough.
For welding material properties, the MTR should be reviewed for grade, heat number, actual chemistry, mechanical properties, and traceability. Chemistry often tells you more about weldability than the strength value alone.
Sulfur, phosphorus, and carbon content should not be ignored, especially when cracking risk, HAZ hardness, or filler selection are concerns. Real batch chemistry matters much more than assumptions based on a label or a memory from the last job.
Common Metallurgy Mistakes That Cause Welding Failures
One of the most common mistakes is treating all steels like mild steel. Another is choosing filler by habit instead of by service requirements.
Skipping preheat because the joint looks simple is another classic failure trigger. So is trusting a material tag without checking the MTR.
Ignoring the HAZ is equally risky. Many weld failures are not caused by poor bead appearance, but by metallurgical changes that were never considered until the part cracked, failed inspection, or did both for extra drama.
First-Hand Field Notes: What Experienced Welders Usually Check
Experienced welders tend to check three things before striking an arc: what the material actually is, what the chemistry suggests, and how much restraint the joint has.
Forgiving materials let average decisions slide. Sensitive alloys do not. That is why basic metallurgy for welders is not academic theory. It is practical judgment that saves rework, delays, and painful conversations after inspection.
Real-World Checklist Before Welding an Unknown Material
Before welding an unknown or less familiar material, confirm identification, review the MTR, assess cracking and HAZ risk, and choose filler and heat control based on actual material behavior.
Then verify that inspection requirements, traceability needs, and procedure documents match the job. That quick review often prevents the very failures people later blame on “bad welding,” when the real issue was bad preparation.
Who This Advice Is For—and When General Guidance Is Not Enough
This guidance is useful for students, welders, fabricators, and supervisors who want better day-to-day judgment around welding metallurgy.
For pressure service, structural code work, critical repairs, or highly restrained joints, general guidance should not replace qualified procedures, engineering review, or code requirements. Experience matters, but compliance matters too.
Conclusion
Welding metallurgy explains why materials respond differently to the same filler, heat input, and cooling rate. Understanding chemistry, mechanical properties, physical behavior, and HAZ response leads to better filler choice, smarter preheat decisions, and fewer surprises during fabrication or repair.
Experience still matters, but when the material is unfamiliar, critical, or code-sensitive, metallurgy and qualified procedures should guide the final decision. That is what turns welding from guesswork into judgment.
Make Better Welding Decisions Before the Arc Starts
Choosing filler metal, reviewing MTRs, and controlling heat input should not feel like guesswork. Our team helps manufacturers and fabricators solve difficult material and welding questions with practical guidance that improves quality, reduces rework, and supports reliable production.
Contact us today to discuss your welding procedure, material selection, or weldability challenges and get expert support before small metallurgy issues become expensive problems.
FAQs
What is welding metallurgy in simple terms?
Welding metallurgy is the study of how a metal’s chemistry, structure, and properties affect weldability, heat response, cracking risk, and final weld performance.
Why is the HAZ so important in welding?
The HAZ is where the base metal changes without melting, which makes it a common area for hardness problems, grain growth, and toughness loss.
What should I check on an MTR before welding?
Check the material grade, heat number, chemistry, mechanical properties, traceability, and any elements that may change cracking risk, filler selection, or preheat requirements.
