
Introduction
The fastest way to stop “pinhole” welds
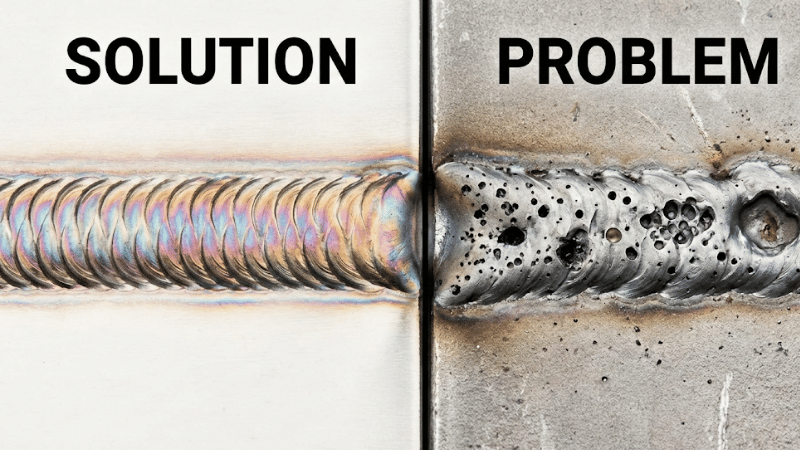
If your weld looks like it caught a case of the measles, you’re dealing with weld porosity—and yes, it’s annoying. The good news: most porosity is fixable fast if you stop “turning knobs randomly” and diagnose in the right order.
What this guide covers (definition → diagnosis → fixes → prevention)
You’ll get a 10-minute diagnostic flow, a screenshot-friendly symptom → cause → fix table, process-specific fixes (MIG/TIG/Stick/FCAW), and a prevention system that makes porosity in welding rare—not a weekly tradition.
What Is Porosity in Welding
Plain-English definition: trapped gas cavities
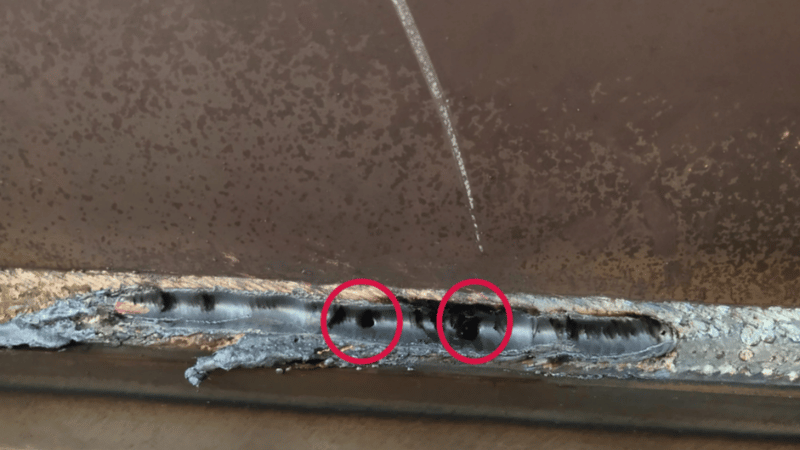
Porosity of welding is simply gas trapped in solidifying weld metal, leaving tiny cavities (pinholes) or larger voids. It can be scattered, clustered, linear, or “wormhole” shaped depending on what’s feeding gas into the puddle or stealing shielding from it.
For a clean technical definition and common causes, see TWI’s porosity overview.
Why you should care
- Strength/fatigue risk: Pores reduce effective cross-section and can become stress concentrators—bad news for cyclic loads.
- Leak-tightness/pressure boundary risk: A weld can “look fine” and still fail leak testing if porosity links up.
- When “cosmetic” becomes “critical”: If the joint is code-controlled, pressure-retaining, fatigue-loaded, or safety-related, weld porosity moves from “ugly” to “unacceptable” quickly. Quality levels and imperfection limits are addressed in standards like ISO 5817.
What Competitor Articles Usually Miss (and What You’ll Learn Here)
A 10-minute diagnostic order (fast wins first)
Many articles list 22 causes and call it a day. This guide prioritizes the checks that solve the majority of cases first: shielding gas flow rate, drafts/turbulence, leaks, contamination, moisture, then technique.
Symptom → cause → fix table you can screenshot
You’ll get a quick decision table that ties visible patterns (start/end/crater/wormhole/scattered) to the most likely root causes and the highest-impact fixes.
Root-cause scoring rubric (stop guessing)
Instead of “maybe it’s the gas… maybe it’s the wire… maybe Mercury is in retrograde,” you’ll score categories 0–3 and run a one-change test to isolate the culprit fast.
The 10-Minute Diagnostic Flow
1) Confirm shielding is actually present
Start with the painfully obvious (because it’s often correct): correct gas, cylinder open, flowmeter stable, and gas actually coming out at the nozzle/cup. Weld porosity loves an “empty cylinder + confident welder” combo.
2) Remove drafts + stop turbulence
Fans, open doors, cross-breezes, and outdoor wind will strip shielding—especially for gas-shielded processes. Also: “more gas” isn’t always better. Too high a flow can create turbulence and pull air into the shield envelope.
3) Inspect the gas path for leaks/restrictions
Check regulator fittings, hoses, quick-connects, torch/gun seals, O-rings, diffuser, and nozzle condition. Even small leaks can entrain air and cause distributed porosity in welding.
4) Cleanliness check (base + filler)
Oil, grease, rust, mill scale, paint, primer, zinc coatings, marker ink, and anti-spatter residue can gas off in the puddle. If the joint was prepped with anything that smells like a chemical factory, assume contamination until proven otherwise.
5) Moisture/hydrogen check
Moisture is sneaky: condensation on cold plate, damp flux/electrodes, wet wire storage, or moisture picked up through leaky gas lines. TWI notes moisture pickup can occur via gas transmission issues and leaks.
6) Technique/parameter sanity check
Keep arc length reasonable, maintain consistent stickout, correct torch angle, and fill craters properly. Don’t whip shielding away at the end and then act surprised when you get crater porosity.
7) Run a controlled test bead
Change one variable at a time and document results. If you change gas flow, travel speed, stickout, and wire brand all at once, congratulations—you’ve created a mystery novel.
Symptom → Most Likely Cause → Fix
| Symptom (what you see) | Most likely cause | Highest-impact fix |
| Porosity scattered along the whole bead | Shielding instability, drafts, leaks, contamination | Block drafts, set stable shielding gas flow rate, leak-check gas path, re-clean joint/filler |
| Porosity at starts | Contaminated start zone, poor pre-flow/start technique | Clean the start area, use lead-in tabs, improve pre-flow (TIG), stabilize gas before striking |
| Porosity at ends (crater pipe) | Stopping too fast, no crater fill, post-flow too short | Crater-fill/backstep, maintain shielding after arc-out, don’t yank torch away |
| Wormhole / elongated pores | Coatings trapped in joint, crevices, poor shielding access | Remove coatings/galv/primer, improve fit-up, use gas lens/cup/nozzle setup that improves coverage |
ISO 5817 treats imperfections like worm holes and crater pipes explicitly, and also notes that “systematic cluster porosity is not permitted.”
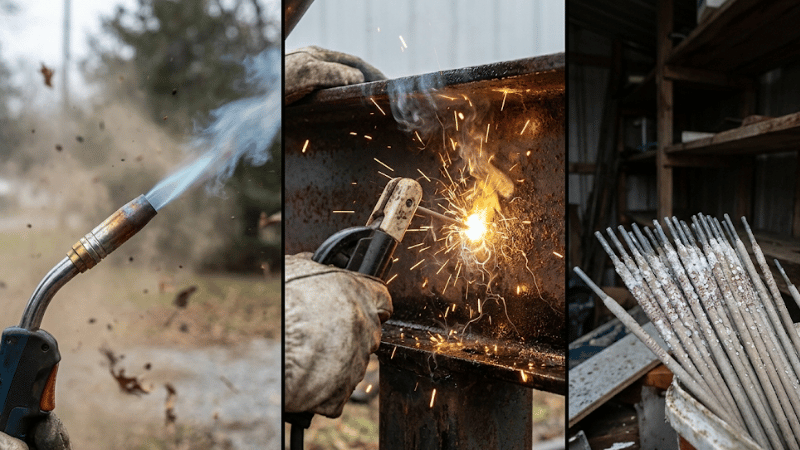
Fixes by Process (Only the High-Impact Ones)
MIG / GMAW
Common culprits:
- Drafts and cross-breezes (yes, even “just a little fan”)
- Gas leaks or restrictions in the gun/regulator/hose
- Nozzle packed with spatter, diffuser damage
- Excessive stickout (CTWD) breaking shielding coverage
Quick corrections:
- Service nozzle/diffuser and confirm gas flow at the nozzle
- Reduce excessive flow that causes turbulence; protect the arc from wind
- Keep CTWD consistent; stop “long-arming” the puddle
TIG / GTAW
Common culprits:
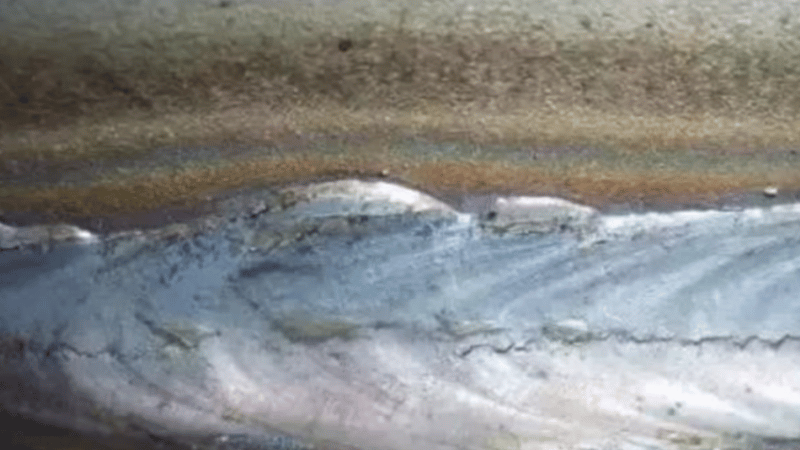
- Post-flow too short (cooling puddle gets oxidized/contaminated)
- Tungsten contamination, dirty filler rod
- Cup too small, poor coverage, no gas lens when needed
- Touching filler into the puddle with a contaminated tip (classic)
Quick corrections:
- Clean tungsten and filler; keep filler ends clean (wipe if needed)
- Use an appropriate cup and consider a gas lens for better coverage
- Increase post-flow to protect the cooling puddle (especially on reactive alloys)
Stick / SMAW
Common culprits:
- Damp electrodes (hydrogen party in your weld pool)
- Long arc length pulling in atmosphere
- Poor surface prep on rusty/painted material
Quick corrections:
- Store electrodes properly (sealed containers / ovens per electrode type)
- Tighten arc length and keep technique steady
- Prep to bright metal where the procedure/job demands it
If you’re welding critical joints, follow the qualified WPS and electrode storage requirements—this is not the place for “close enough.”
FCAW
Common culprits:
- Wind sensitivity for gas-shielded FCAW (outdoors = drama)
- Wire contamination or poor handling
- Incorrect stickout/angle for the wire type
Quick corrections:
- Shield from wind; use screens/tents
- Verify wire is clean/dry and feeding smoothly
- Set stickout/parameters per the wire manufacturer’s guidance
(And yes: check whether you’re running self-shielded vs gas-shielded FCAW—mix-ups happen more than anyone likes to admit.)
Prevention System
Pre-weld checklist (1-page)
Use this as a repeatable system, not a once-a-month “good intention.”
- Confirm correct gas + stable shielding gas flow rate (and no turbulence)
- Control drafts/wind; position screens if needed
- Inspect nozzle/cup/diffuser and gas path for leaks
- Clean joint faces and surrounding area (remove oil/rust/paint/primer/zinc)
- Keep filler/flux/electrodes dry; avoid condensation exposure
- Confirm technique basics: stickout, arc length, travel speed, crater fill
Consumables storage rules
- Keep wire/rods/electrodes sealed and dry
- Label open dates; avoid humidity cycling
- Let cold consumables warm up before opening to prevent condensation
Basic equipment care
- Routine leak checks (soapy water works—no need for a PhD)
- Replace worn O-rings/hoses and damaged diffusers
- Keep nozzles clean; spatter buildup messes with gas coverage and flow pattern
Fresh Insight — Root-Cause Scoring Rubric
Score each category 0–3
Give each bucket a score (0 = great, 3 = very suspicious). Highest score gets tested first.
| Category | 0 | 1 | 2 | 3 |
| Shielding | Stable coverage | Minor doubt | Likely turbulence/draft | Clearly missing/unstable |
| Environment | Controlled | Occasional air movement | Regular drafts | Wind/fans/doors open |
| Contamination | Bright, clean | Light oxide | Rust/scale/coatings nearby | Oil/paint/zinc in joint |
| Moisture/H | Dry | Some humidity exposure | Damp storage signs | Wet/damp electrodes/flux |
| Equipment | Good condition | Wear present | Possible restriction/leak | Obvious leak/damage |
| Technique | Consistent | Slight inconsistency | Common porosity habits | Long arc, bad crater habits |
TWI notes even small air entrainment can cause distributed porosity—so “slightly suspicious” shielding deserves real attention.
The “one-change test” protocol
- Run a short test bead
- Change one variable (gas flow, wind block, cleaning method, stickout, post-flow, etc.)
- Run another bead in the same conditions
- Record results (photo + notes).
This turns troubleshooting from superstition into process control. Beautiful.
Conclusion
- Diagnose in this order: gas present → drafts/turbulence → leaks/restrictions → cleanliness → moisture → technique/settings.
- Most weld porosity is fixed by stabilizing shielding coverage and eliminating surface contamination and moisture/hydrogen.
- Repair correctly: remove to sound metal, re-clean, then re-weld only after the root cause is controlled.
- Prevention works best as a system: storage + prep + quick equipment checks beat “hope” every time.
Take the Next Step
Built for Extreme Conditions
Professionals working in environments like this don’t gamble on equipment. Reliability, durability, and compliance aren’t features—they’re survival tools. Explore heavy-duty welding solutions engineered for the harshest industrial conditions.
➡️ Visit iKratz.com to See Professional Welding Equipment
Talk to People Who Understand the Risk
Every extreme project needs the right setup. iKratz specialists help match equipment to conditions—on land or offshore.
➡️ Submit an Inquiry & Project Specifications Today
Frequently Asked Questions
Q1: Why does porosity occur in welding?
A: Porosity happens when gas is trapped in the molten weld metal. Common causes include insufficient shielding gas flow, gas leaks, surface contamination (like oil or rust), and moisture. Ensuring proper gas flow and a clean surface are key to preventing it.
Q2: How do I know if porosity needs repair?
A: Porosity that affects strength, leak-tightness, or passes through inspections usually requires repair. If it’s small and doesn’t impact weld function, it may be acceptable, especially in non-critical areas.
Q3: How can I prevent porosity?
A: Prevent porosity by ensuring stable gas flow, clean and dry materials, and controlling welding parameters. Avoid drafts and moisture, and always clean the surface before welding.


