
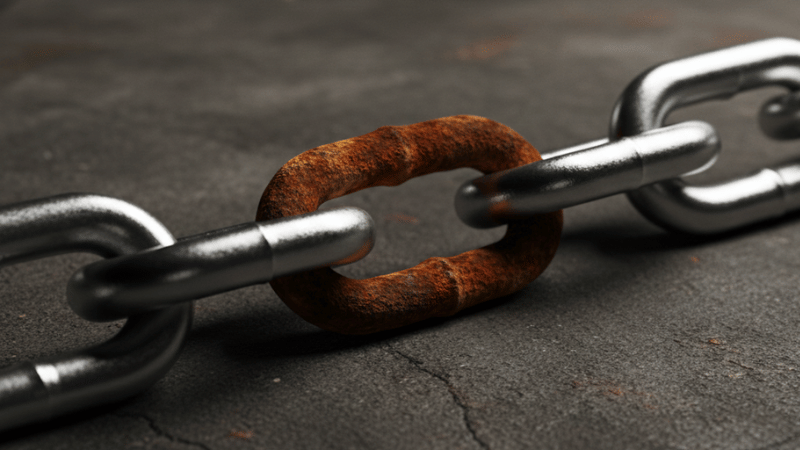
The real problem behind “stainless rusting”
Stainless steel isn’t magic. It’s steel that behaves like magic only when its surface is clean and chromium-rich. Add shop grime, free iron contamination, heat tint, or salty service conditions—and your “stainless” starts cosplaying as mild steel.
What you’ll get from this guide (definition + SOP + proof)
This guide gives you a plain-English definition of passivation of stainless steel, a shop-friendly SOP, decision rules for when to use it, and verification tests that keep QA calm and customers quieter.
Quick myth-buster: passivation is not a coating
Passivation is not paint, plating, or a “mystery protective layer.” It’s a controlled chemical treatment that removes surface contamination and helps stainless rebuild a stable passive film. For the formal definition, see ASTM A967.
What Is Passivation? (Plain-English Definition)
What passivation does
The passivation process removes surface iron/contaminants and supports a stable passive oxide film (the alloy’s “invisible shield”). In real life, it’s how you kick free iron contamination off the surface before it throws a rust party.
What passivation does not do
Passivation is not a cure-all. It’s not:
- a fix for the wrong alloy in chloride-heavy service
- a replacement for weld oxide removal when heat tint is heavy
- a substitute for clean handling and smart packaging
If the basics are broken, passivation can’t “out-solve” physics.
“Passivated stainless steel” meaning in specs and purchase orders
When a PO says “passivated stainless steel,” it usually implies:
- process per a recognized standard (often ASTM A967)
- verification testing (method defined in spec/PO)
- documentation: lot traceability, bath controls, test records
If your PO just says “passivate per standard,” it’s basically a blank check for arguments later.
Why Stainless Steel Can Rust in the Real World
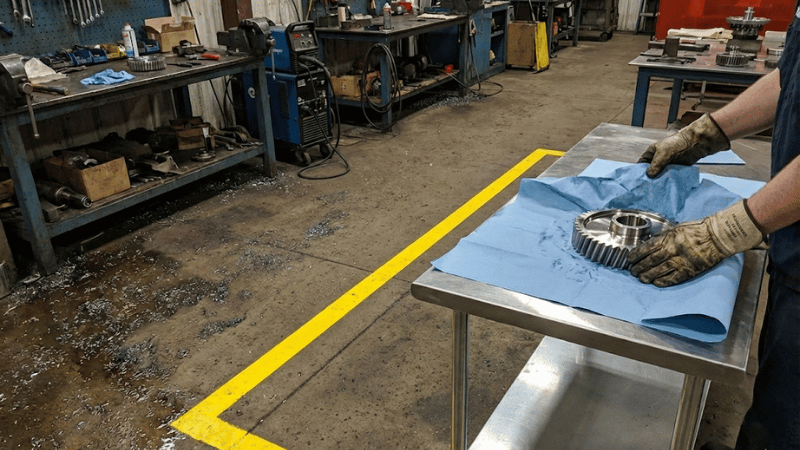
Free iron contamination (the most common shop-floor cause)
The most common “stainless rusted” root cause is free iron contamination—carbon steel particles embedded or smeared onto stainless. Those particles corrode first, and stainless gets blamed like it forgot your birthday.
Common sources:
- shared grinding belts, wire brushes, polishing wheels
- carbon-steel fixtures, tables, racks
- airborne shop dust and swarf
- “temporary” contact with carbon steel tools
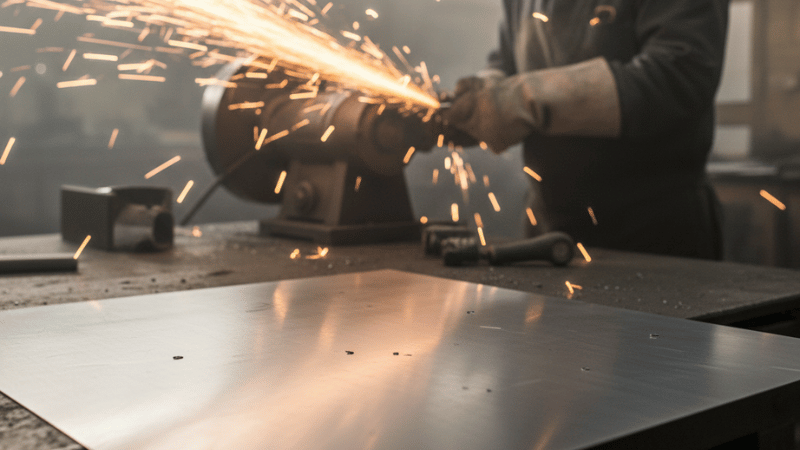
Fabrication triggers
Machining, grinding, and abrasive blasting can introduce residues and embed contaminants. If your cleaning is weak, passivation of stainless steel becomes “acid-flavored disappointment.”
Welding/heat tint and what it signals
Heat tint often means surface oxides and local chromium depletion. Light discoloration might clean up and passivate well. Heavy tint/scale typically needs descaling/pickling first (then passivation).
Service environment triggers
Even well-finished stainless can corrode when the environment is aggressive:
- chlorides (salt, bleach residues, coastal air)
- crevices and stagnant water
- harsh cleaners and temperature cycles
For a deeper technical overview on chloride-driven localized corrosion, see NIST corrosion publication (PDF).
When Do You Need Passivation? (Practical Triggers + Decision Rules)
“Always passivate” situations
If any apply, don’t overthink it:
- hygiene-critical parts (food, pharma, bioprocess, clean utilities)
- critical corrosion resistance requirements
- customer/standard-driven requirements
- high-liability applications where failure is expensive
“Usually passivate” situations
You usually want passivation after:
- machining, grinding, bead blasting
- abrasive finishing (especially if media is shared or unknown)
- any carbon-steel contact risk
- weld cleanup after oxides are appropriately removed
When passivation may be unnecessary (and what to do instead)
If you have stainless-only tooling, controlled handling, minimal fabrication, and mild service conditions, passivation may be optional. In that case, focus on clean handling controls, verified cleaning, and periodic spot checks.
Fast decision checklist (shop supervisor friendly)
If YES to any → passivation recommended:
- welded or heat tinted?
- machined or abrasively finished?
- any chance of carbon steel contact?
- chloride/wet/stagnant service conditions?
- spec/PO calls for ASTM/AMS requirements?
Standards That Govern Passivation (and Why They Matter)
ASTM A967 vs ASTM A380: what each covers and when to cite
In practice:
- ASTM A967 is the most common “do passivation + verify it” reference for stainless parts
- A380 is often referenced for broader cleaning/descaling guidance, but if you need a single anchor for passivation + tests, A967 is the one buyers recognize
How to write a passivation callout on drawings/POs
To reduce disputes, write callouts like:
- “Passivate per ASTM A967, method specified by supplier capability; verify using [test method], acceptance: no indication.”
- “Passivate per ASTM A967; include bath parameters, lot traceability, and test results in CoC pack.”
Common compliance pitfalls
- “passivate per standard” without naming test method or acceptance criteria
- no sampling plan defined (“one part” vs “every part” becomes a drama series)
- ignoring rinse water quality and post-process handling contamination
The Passivation Process (Step-by-Step SOP)
Step 0 — Material & process review
Before chemistry, review:
- alloy family and surface condition
- welded vs machined vs blasted surfaces
- known contamination paths and handling steps
If you mix finishes/alloys in one lot, document it. QA hates surprises.
Step 1 — Pre-cleaning (non-negotiable)
This is where most failures are born. Remove:
- oils, grease, coolants, polishing compounds
- abrasive residues and shop soils
If you don’t clean, you’re not passivating. You’re just “seasoning contamination.”
Step 2 — Descaling/pickling (only when needed)
If heat tint/scale is present, remove oxides first. If not, skip.
For practical cleaning/descaling guidance, see Nickel Institute cleaning & descaling stainless steel (PDF).
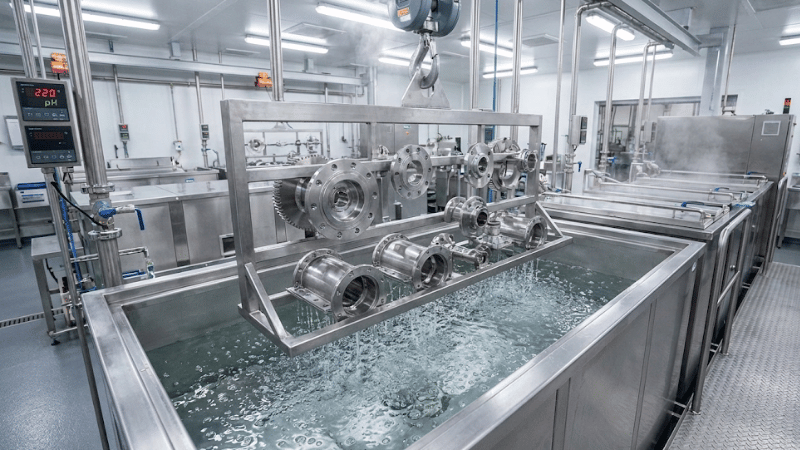
Step 3 — Passivation bath (chemical treatment)
Run a controlled passivation bath (nitric or citric), controlling:
- concentration, temperature, time
- load density and agitation
- bath life and contamination pickup
Your best friend here is boring discipline. Your worst enemy is “we eyeballed it.”
Step 4 — Rinse, neutralize (if required), and dry
Rinse thoroughly with controlled water quality. Dry cleanly and fast.
Dirty rinse tanks can undo perfect chemistry in minutes.
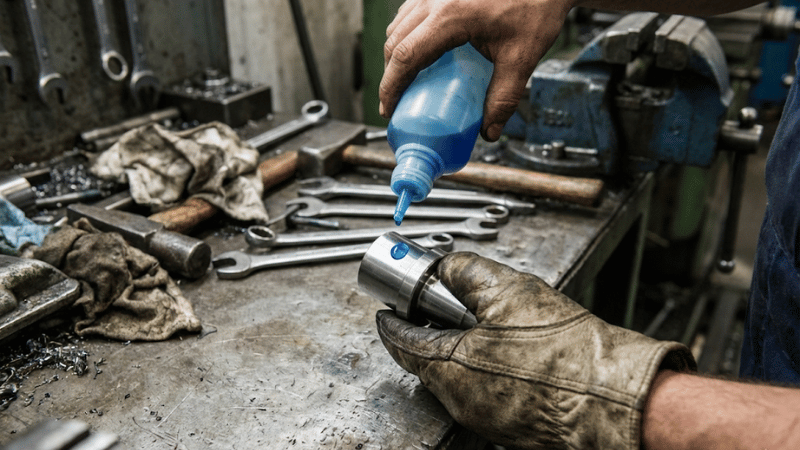
Step 5 — Post-process handling & packaging
Post-passivation, parts are clean and reactive. Use:
- gloves, clean racks, stainless-only contact
- segregated storage away from carbon steel operations
- packaging that prevents metal-to-metal rub and contact transfer
Step 6 — Documentation & traceability
Record:
- lot ID, bath parameters, bath maintenance
- test method, sample plan, results
- nonconformance handling and corrective actions
If it isn’t documented, it didn’t happen.
Nitric vs Citric Passivation (Which Should You Choose?)
Performance considerations
Nitric is the legacy workhorse and widely accepted. Citric is popular for EHS and workflow benefits. The key is staying inside your spec requirements and verifying results with the specified test method.
Safety & environmental considerations
Citric often reduces fume burden and can simplify handling. Nitric can require stronger ventilation controls and more robust waste treatment—depending on your facility and local requirements.
Cost & workflow considerations
Don’t just compare chemical cost. Compare:
- dwell time and throughput
- rework risk from failed tests
- training and handling burden
- facility readiness and compliance support
A simple selection rubric (scorecard)
Choose nitric when:
- customer specs strongly prefer it
- you need maximum legacy acceptance
- your facility is already equipped for nitric controls
Choose citric when:
- EHS/ventilation constraints are real
- you want simpler handling and potentially easier waste management
- your spec allows it and your verification method is dialed in
How to Verify Passivation Worked (Testing + Acceptance)
What “success” looks like
Success means:
- no detectable free iron contamination
- meets the specified test acceptance criteria
- surface is clean (no residues, stains beyond allowed visual limits)
Common verification tests (when to use each)
Typical verification includes:
- copper sulfate test (quick contamination indicator)
- ferroxyl test (more sensitive for iron contamination)
- humidity/rust testing (slower, more environmental)
- visual inspection as a screening gate
What tests can’t tell you
Quick tests detect surface contamination and process effectiveness. They don’t guarantee zero corrosion in every chloride/crevice environment. If service conditions are harsh, design and alloy selection still matter.
QA documentation checklist
Include:
- test method and revision
- sample plan and traceability
- acceptance criteria and fail actions
- corrective action triggers (bath change, rinse upgrade, handling controls)
Common Failure Modes (and How to Fix Them Fast)
“We passivated it and it still rusted” root-cause map
Most failures trace back to:
- weak pre-cleaning
- recontamination after passivation (racks, rinse, handling)
- wrong time/temp/concentration control
- poor rinse water quality
- carbon steel contact during drying/packaging
Troubleshooting by symptom
- spotting rust freckles: localized contamination, dirty rinse, contact transfer
- orange haze: airborne iron, shared tooling, poor segregation
- rust at welds: oxides/heat tint not removed before passivation
- streaking: rinse/dry quality issue
- recurring returns: packaging/handling system problem (not chemistry)
Corrective actions and prevention controls
- tool segregation (stainless-only abrasives/brushes)
- dedicated racks and staging zones
- rinse tank maintenance schedule
- clean packaging and handling SOP
- basic audits: cleanliness + handling checkpoints
What Competitor Articles Usually Miss
A decision framework you can actually use
The real win isn’t “passivation removes iron.” It’s knowing when to:
- clean vs descale/pickle vs passivate
- choose nitric vs citric based on facility/spec realities
- prevent recontamination after the bath
Verification that stands up to QA and customers
Verification is what ends disputes:
- test selection aligned to your spec
- acceptance criteria written down
- documentation pack that’s audit-ready
A realistic in-house vs outsource comparison
In-house passivation can be great—if you can control EHS, waste, and repeatability. Outsourcing can be smarter when requirements are strict and risk tolerance is low.
In-House vs Outsourcing Passivation (Make the Call)
When in-house makes sense
In-house works when you have:
- stable volume
- mature process controls
- EHS readiness and trained operators
- consistent rinse/dry/handling discipline
When outsourcing is smarter
Outsource when:
- parts are high-risk or high-liability
- specs are strict and documentation is heavy
- your facility lacks ventilation/waste infrastructure
- you need repeatability without building a chemical finishing department
Vendor evaluation checklist
Ask:
- which standards can you certify to (e.g., ASTM A967)?
- which verification tests do you run and how do you document results?
- how do you prevent post-process recontamination?
- what’s your traceability and CoC format?
Experience Section 1 — Field Notes From the Shop Floor
The most common contamination paths (and how we eliminated them)
The “gotchas” were ordinary:
- shared finishing tools
- staging near carbon steel grinding
- carbon steel racks labeled “temporary”
Fixes that worked:
- stainless-only tool segregation
- dedicated staging area away from carbon steel operations
- clean racks and “no bare steel contact” rules
Handling and packaging changes that reduced rust complaints
Two changes that paid off fast:
- gloves + clean wraps post-process
- packaging that prevents rubbing and contact transfer
“If we could redo it” lessons learned
We’d start with discipline, not chemistry:
- cleaning validation
- rinse maintenance
- handling SOP + audits
Because passivation of stainless steel can’t compensate for chaos.
Experience Section 2 — A Mini Walkthrough Case Study
Scenario: rust spots after machining and bead blasting
A batch of 304 parts showed rust spots days after machining + bead blasting. Material got blamed. Reality was contamination transfer plus inadequate cleaning.
The chosen process route and why
We used:
- strong pre-cleaning to remove coolants and blasting residues
- passivation method allowed by spec
- controlled rinsing and clean drying
- clean handling + improved packaging
Verification steps and documentation delivered
We verified via the specified contamination test method and delivered:
- lot traceability
- bath parameters
- test results + acceptance criteria
- CoC pack referencing the governing standard
Preventive controls added to stop recurrence
- dedicated blast media for stainless
- stainless-only racks and staging
- clean-handling zone after passivation
Safety, Limitations, and Who This Advice Is For
Safety notes
Acids require:
- PPE, ventilation, spill readiness
- training and incompatibility controls
- waste treatment planning and compliance
Limitations and assumptions
This guide assumes professional manufacturing controls. Surface condition and design still matter, especially in crevice/chloride service.
Who this guide is/isn’t for
This is for production environments that need an SOP + verification + defensible records. If your “process control” is a Sharpie and vibes, don’t start with acids.
Conclusion
Passivation of stainless steel removes free iron contamination so the alloy’s natural passive film can protect the surface. It’s not a coating—and it won’t rescue the wrong alloy or a dirty, heat-tinted surface.
For consistent results, lock in a simple system: clean well, choose the right nitric/citric route, rinse and dry cleanly, and prevent recontamination during handling. Verify with the specified test, document it, and your “stainless rusted” problems get a lot rarer.
Take the Next Step
Built for Passivation-Level Consistency, Not “Good Enough” Rinses
When corrosion resistance matters, passivation of stainless steel can’t be “dip and hope.” Stable results come from solid cleaning, controlled bath parameters, clean rinsing/drying, and contamination-free handling—so outcomes don’t depend on who’s running the line.
➡️ Visit iKrtaz Website to See Professional Passivation Support
Talk to People Who Think in Bath Controls and QA Proof
If you’re managing ASTM requirements, mixed fabrication steps, and verification testing, we’ll map your conditions (alloy, finish, geometry, contamination risk, spec needs) to a safer process route and clearer acceptance plan—so you meet targets without turning every lot into “test day.”
➡️ Submit an Inquiry & Project Specifications Today
Frequently Asked Questions
Q1: What is passivation of stainless steel, and is it a coating?
A: Passivation of stainless steel is a chemical treatment that removes free iron contamination and supports the metal’s natural passive film. It does not add a coating or plating layer.
Q2: Do you need to passivate stainless steel after welding or machining?
A: Often yes. Fabrication can introduce contamination and heat tint/oxides. Whether you need cleaning, descaling/pickling, passivation, or all three depends on surface condition, service environment, and ASTM/customer requirements.
Q3: How do you verify stainless steel passivation worked?
A: Use the test method required by your spec (commonly contamination/free-iron checks) and document process parameters, sampling plan, results, and acceptance criteria.
