
Introduction
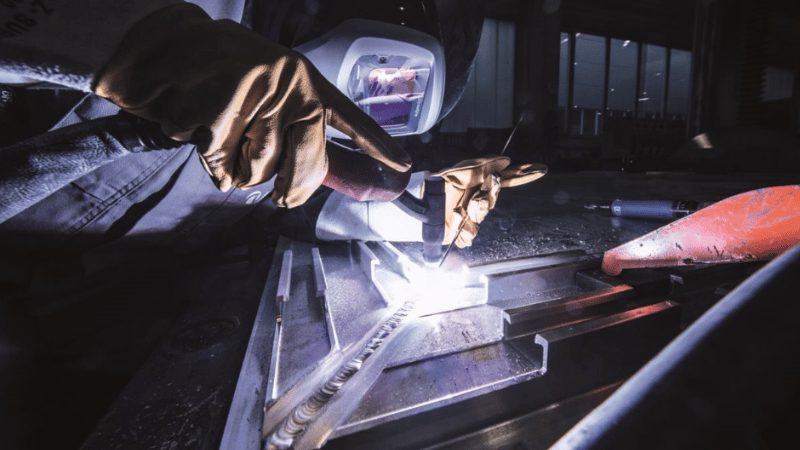
TIG welding aluminum is the fastest way to learn humility in a clean shop. The puddle forms late, then suddenly becomes a swimming pool, while the aluminum oxide layer sits on top like armor plating and laughs at your “perfect settings.”
This guide simplifies the chaos: a quick-start workflow, starter AC TIG aluminum settings, and a “change this first” troubleshooting order that keeps you from turning every knob like you’re cracking a safe.
What Competitor Articles Usually Miss
Most posts give you a settings chart and a prayer. What they skip is the sequence: what to set first, what to watch, and what to tweak when the weld looks weird. In practice, TIG welding aluminum is less “find the magic number” and more “manage oxide, gas coverage, and runaway heat—on purpose.”
So you’ll get three things: a 2-minute quick start, a settings decision order, and a small symptom→cause→fix matrix for the problems that actually show up on real parts.
Safety, Limits, Assumptions
Welding safety is not a vibes-based hobby. UV, hot metal, fire risk, and fumes deserve the same respect you give a spinning chuck. For ventilation requirements and baseline rules, see OSHA’s 1926.353 ventilation standard and the OSHA welding standards hub.
For fume control reality checks, NIOSH shows how local exhaust ventilation can significantly reduce welding fume concentrations when positioned correctly.
Assumptions in this article: AC TIG, clean aluminum, and argon shielding gas. If you’re doing code-critical work, treat this as learning material—not a replacement for a WPS.
Quick Start: A Repeatable Workflow (Use This First)
If you only follow one section, make it this one. TIG welding aluminum gets dramatically easier when you stop improvising the steps.
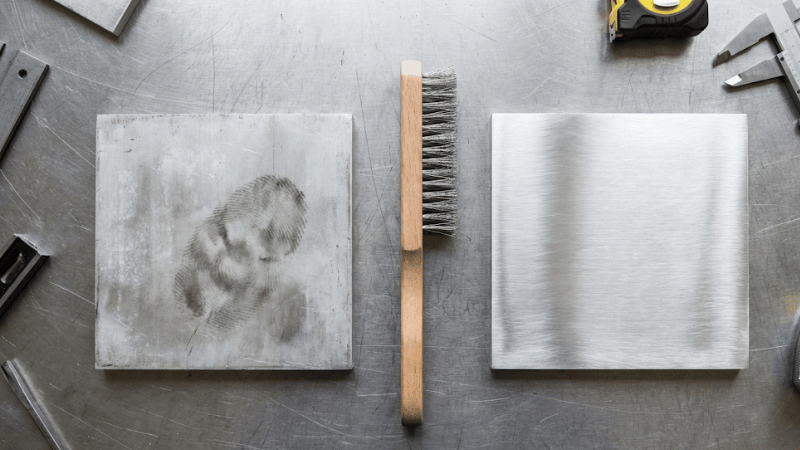
Step 1: Clean like you mean it
Degrease first, then brush with a dedicated stainless brush that never touches carbon steel. If you skip degreasing, you’re basically seasoning the weld with mystery oils. Keep the focus on removing the oxide layer and preventing re-contamination before you strike an arc.
Step 2: Fit-up and tack for heat control
Tight, consistent fit-up reduces “puddle suddenly disappears” moments. Use enough tacks to keep the joint stable as heat builds, especially on thin or long parts. Aluminum moves when it’s hot—sometimes dramatically—so treat tacking like insurance.
Step 3: Starter machine setup (simple, not sacred)
Start near machine defaults, then tune with purpose. Manufacturer behavior varies, so it’s worth reading how AC balance control affects cleaning vs penetration on your specific style of waveform.
A practical baseline:
- Mode: AC TIG, stable start method for your machine
- Gas: 100% argon
- Control: use a foot pedal heat control plan (hot start → taper down as the part heat-soaks)
For gas flow, use a sane range and adjust to cup/lens and drafts. Linde suggests using a gas lens and flow rates around 15–20 CFH for TIG in typical setups.
Step 4: Run your first bead with three priorities
Keep a short arc length, keep a steady travel speed, and build a small stable puddle before you get fancy. If something goes wrong, change one variable at a time—because “I changed four things and it got worse” is not a diagnosis.
AC Settings Explained (So They Stop Feeling Like Sorcery)
Here’s the mental model that keeps settings from becoming a religion: amps control total heat, balance controls surface cleaning vs penetration bias, and frequency controls arc focus and placement.
Amps (and a thickness starting point)
A common rule of thumb is “about 1 amp per 0.001 inch,” but treat it as a parking spot—not your home address. It gets you close, then your pedal and technique do the real work.
What to watch:
- Too cold: puddle forms late, filler stacks, fusion looks lazy
- Too hot: puddle washes out, edges collapse, the joint starts “dripping”
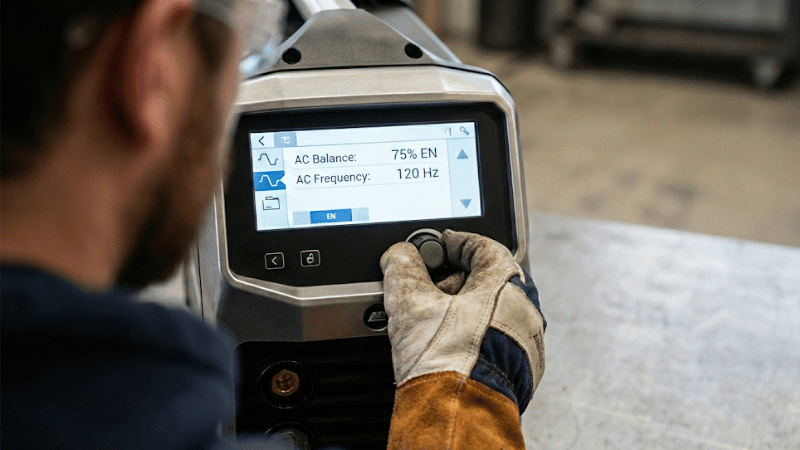
AC balance (cleaning vs penetration)
AC balance (%EN/%EP) changes how much time you spend on cleaning action vs driving heat into the base metal. More cleaning can help when the surface looks dirty, but too much cleaning trades away penetration and overheats tungsten. Miller’s breakdown is a useful reference for what the control is doing.
Visual cue: if you see excessive etched “cleaning zone” and the weld still lacks fusion, you’re paying too much for cleaning.
AC frequency (arc focus)
Higher AC frequency (Hz) generally tightens the arc for better directional control, while lower frequency spreads it wider. The Fabricator describes how increasing AC frequency tends to produce a more focused arc and narrower bead/cleaning area.
If you struggle placing the arc in corners or fillets, frequency is often the easiest lever.
The “Change This First” Decision Order
This is the part that keeps your shop time from turning into knob-twisting cardio.
- If the puddle is unstable: fix amps + pedal use + travel speed + arc length first
- If the weld looks dirty/sooty: fix prep and argon shielding gas coverage, then adjust AC balance
- If the arc is hard to place: adjust AC frequency
- Only after those: consider optional tools like pulse or heat sinks
This order works because most aluminum ugliness is either contamination, poor shielding, or unmanaged heat buildup.
Technique That Stops Dips, Washout, and Panic
You can absolutely ruin a perfect setting with sloppy technique. Luckily, aluminum rewards consistency fast.
Torch angle and arc length
Keep torch angle consistent and don’t over-lean. Stay tight on arc length—long arcs widen heat, invite oxidation, and increase the odds of tungsten contamination when your hand drifts.

Puddle management with the pedal
Aluminum heat-soaks, so what felt “just right” at the start becomes too hot later. Start hot enough to establish the puddle quickly, then taper down using foot pedal heat control as the part warms up. This one habit fixes a shocking number of “my weld started great then turned ugly” stories.
Filler timing that actually works
Dab at the leading edge of the puddle and keep the rod inside the gas coverage. Pulling the rod out into open air between dabs is a great way to import oxidation into your next dip.
Ending the weld
Fill the crater and don’t rush post-flow. Many aluminum cracks start as “I stopped too fast and left a crater like the Grand Canyon.”
Troubleshooting Matrix (Top Issues Only)
When TIG welding aluminum goes sideways, it usually repeats the same few failures. Here’s the short list.
Porosity
Typical causes: contamination, poor shielding, drafts/leaks, dirty filler. Fix it by redoing prep, checking gas coverage, and keeping filler clean and in the gas. If you’re chasing porosity with balance/frequency, you’re fixing the wrong thing.
Black soot / peppery oxide
Typical causes: shielding loss or surface contamination. First fix gas coverage and clean again; then nudge balance toward more cleaning only if needed. If it improves when you block a draft, congratulations—you just solved it without touching a knob.

Washout / burn-through
Typical causes: too much heat, slow travel, no pedal taper. Fix by speeding up slightly, tapering amps as heat builds, and using a backing bar/heat sink on thin sections when practical.
Tungsten contamination
Typical causes: long arc, shaky bracing, filler contacting the tungsten/arc. Fix with tighter arc length, better bracing, disciplined filler placement, and a fast regrind routine the moment contamination starts.
Practice Plan (Experience You Can Repeat)
Session 1: puddle-only beads (no filler) to master arc length and travel consistency.
Session 2: add filler rhythm—steady travel with clean, repeatable dabs.
Session 3: fillets/corners—practice arc placement and pedal taper as heat builds.
Track progress with boring metrics that work: fewer regrinds, consistent bead width, and fewer “why did it suddenly do that?” moments.
Conclusion
TIG welding aluminum isn’t about finding one perfect number—it’s about stacking a few fundamentals until the process becomes predictable. Nail prep, protect the puddle with argon shielding gas, run a short arc, and use a deliberate pedal taper as heat builds.
Take the Next Step
Built for Repeatable Aluminum TIG Results
Pros don’t gamble when TIG welding aluminum needs to be clean and consistent. If unstable arcs, heat buildup, or surprise porosity are costing time, it’s time for equipment built for control and repeatability. Explore iKratz solutions that help stabilize AC TIG aluminum settings and reduce rework in real shop conditions.
➡️ Visit iKratz to See Professional Welding Equipment
Talk to People Who Understand the Variables
Alloy, thickness, joint design, access, and quality requirements change the setup fast. iKratz specialists help match the right solution—manual support or automated/orbital options—so your welds stay predictable.
➡️ Submit an Inquiry & Project Specifications Today
Frequently Asked Questions
What AC balance and frequency should I start with for TIG welding aluminum?
Start near machine defaults. Increase AC balance cleaning only if the surface stays dirty after good prep and shielding, and increase AC frequency (Hz) when you need a tighter, more controllable arc.
How many amps do I need for TIG welding aluminum by thickness?
Use a thickness-based starting point as a rough guide, then rely on foot pedal heat control to taper down as the part heat-soaks. The “1 amp per 0.001 inch” rule can help you get in the ballpark, but it’s not a promise.
Why does my tungsten keep getting contaminated on aluminum?
Most often it’s a long arc, weak bracing, or the filler contacting the tungsten/arc. Tighten arc length, brace both hands, keep the filler in the gas, and regrind as soon as tungsten contamination starts.
